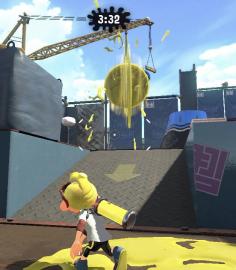
Using the Sploosh-O-Matic 7
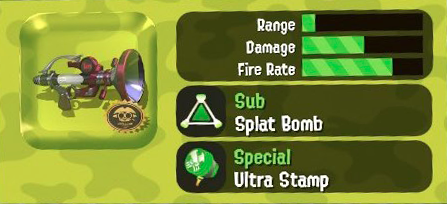
Why the Sploosh 7?
You can use any weapon you want in Rainmaker, but Sploosh 7 is a particularly effective pick for the following reasons:
- It's lightweight, which gives it a 5% increase in swim speed (an essential ability for rotating between positions as fast as possible)
- It has a high Damage Per Second (DPS), which is useful both for popping the rainmaker shield and for ambushing opponents who push into your base
- It has a lethal bomb (Splat Bomb), which serves to immediately control the area in front of the rainmaker on defense, or flush the enemy team out of position on offense.
- It has Ultra Stamp which, similar to Splat Bomb, serves to instantly take space or move the enemy out of position. Stamp is also useful to shield the rainmaker carrier from incoming bombs and shots.
- It has a high paint output, which helps you take space quickly and gives you paint to shark in on defense
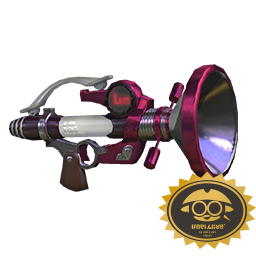
The Main Weapon
The Sploosh-O-Matic itself is very well-suited for Rainmaker.
Use its high DPS to shred the Rainmaker
shield, shark for insta-kills on the Rainmaker carrier, and tear
through any defenses the enemy team puts up.
Its range is quite short, so
keep yourself in safe, hidden positions
as often as possible and don't make yourself known to the enemy team
until it's absolutely necessary.
Use the speed and paint output to your
advantage by covering new area as quickly as possible and covering
your base with a large, even coat of paint to shark in when
defending.
Splat Bombs
Splat bombs are lethal bombs, which means
they have the potential to kill the enemy instantly when they
explode (without needing to combo with other damage). Lethal bombs
serve as guaranteed area control because after you throw one, you
know the space you threw it in will be clear once it explodes
(because the enemy will have either moved or died at that point).
This is important for all modes, but
in Rainmaker they're especially necessary for defense. The Rainmaker carrier's goal is to get to the pedestal, so the
defending team will want to do whatever they can to prevent them
from getting near it.
 However, because pushes in rainmaker happen very fast,
many of the usual forms of defense
(ex. charging a charger or splatling, setting up ink mines, or even
just taking the time to properly aim at your opponent)
are not fast enough to prevent the Rainmaker from moving
forward. Lethal bombs, on the other hand, are instant, easy to use, and
guarantee control of an area.
However, because pushes in rainmaker happen very fast,
many of the usual forms of defense
(ex. charging a charger or splatling, setting up ink mines, or even
just taking the time to properly aim at your opponent)
are not fast enough to prevent the Rainmaker from moving
forward. Lethal bombs, on the other hand, are instant, easy to use, and
guarantee control of an area.
Use Splat Bombs to your advantage by throwing them between the
Rainmaker and the pedestal
any time you're defending. The longer you keep the Rainmaker at bay,
the longer you'll have to charge your specials, get a pick, and
start a counterpush.
You can also use Splat Bombs during a push
by throwing them at the positions you would normally be in to
defend. This ensures that all the best defensive positions are
difficult to stand in, making it all the more awkward for the enemy
team to do their job.
Ultra Stamp
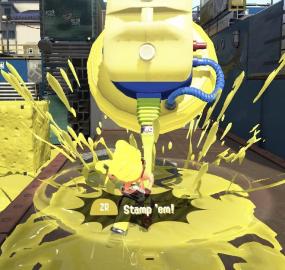
Ultra Stamp serves a very similar function to Splat Bombs
in that it's lethal and guarantees area control wherever it's
stamped or thrown. In addition to that, it can also serve as a
shield to the rainmaker, blocking incoming shots and bombs.
Use the Ultra Stamp to your advantage during a push
by positioning yourself in between the Rainmaker and any defending
players and hammering forward, trying to block their attacks.
 You can also use it to paint a trail up
to the pedestal, as the stamp trail leaves enough ink to swim in. If
the defense is above you to the point where they're out of reach of
your stamp, you can also
throw your hammer at them like you would
a bomb to guarantee they won't be there for a moment.
You can also use it to paint a trail up
to the pedestal, as the stamp trail leaves enough ink to swim in. If
the defense is above you to the point where they're out of reach of
your stamp, you can also
throw your hammer at them like you would
a bomb to guarantee they won't be there for a moment.
Try to save your Ultra Stamp for offense
if you possibly can, but if you must use it on defense, you can
position yourself between the enemy team and your pedestal and block
their path by hammering forward. You can also use your hammer to
quickly pop the Rainmaker shield if
needed.
Gear
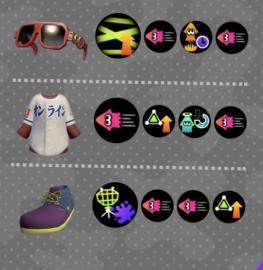
Gear is largely up to you, but I recommend running
last ditch effort (LDE), object shredder (OBS), and as much swim
speed as possible. Utility subs (ink resistance, bomb defense DX, and quick
superjump) are also nice to have, but aren't as essential as the
first three.
I personally use two subs of sub power up to be able to reach more
positions with my splat bombs, and special saver to have my special
ready sooner on defense. Sub abilities like this aren't absolutely
essential, though, and I recommend experimenting and finding gear
that works for you.